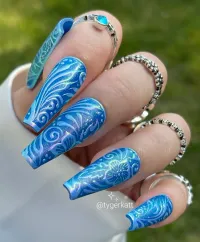
You've Got Nail Mail!
Congratulations! Your nails have arrived and you're ready to slay... now what?
First, you'll want to decide how long do you wish to wear them, and if you want the option to reuse them. For short durations and future re-use, the included gel glue tabs are ideal. For longer wear, you will need glue or a combination of tabs and glue, but the first very important step is PREP!
I'll create the stunning nails, then provide you with the support and info you'll need to apply them. You are now your own "Personal Prep Tech". You'll learn how to prep your nails and apply your press ons to best suit your lifestyle. You've got this.
*If gluing for extended wear, lightly buff the underside portion of the press on nail that will make contact with your natural nail with the provided file stick. If using gel glue tabs, leave the surface smooth for best adhesion.
1. Clean, shape, file.
For best results, cut your natural nail short. Push back the cuticles gently with the included orange stick and trim any dead tissue away carefully with manicure tools (not provided). Pay special attention to the cuticle area and push back any tissue growing over the nail surface near the cuticle. Lastly, graze the surface of the nail ever so slightly with the included medium grit file just to rough it a tiny bit. I do not recommend anything more than that to avoid thinning or damage.
2. Dehydrate and prep. The surface of your nail must be free of dust or oils. Use an included alcohol prep pad to clear away dust, oils and contaminants that can prevent a good bond. For future use, simply wipe with alcohol or polish remover (acetone) and a lint free pad to ensure no fibers remain on the nail surface.
3. Application.
For tabs, apply the way that is easiest for you. I prefer placing the tab on my natural nail, then applying the cover nail. Others find it easier to apply the glue tab to the cover nail and affix it to thie natural nail. Either is fine, just ensure that you don't touch the sticky surfaces of the tab during application. The more rounded end faces the cuticle.
✨ I've found that the tabs adhere best to a smooth polished nail. Consider a protective clear coat on your natural nail; it will seal and protect your nail, and provide a tight, moisture-resistant bond for the glue tab.
When using glue, remember that less is more! Most glue troubles happen because too much is used. A small drop is usually sufficient. Position the nail at the cuticle edge, then down over your nail, pressing firmly but comfortably for 20-30 seconds.
Some users like to use a combination of tabs and glue, applying the tabs normally, but adding a small drop of glue as well. While I haven't personally tried this method, wearers report as much as three weeks of continuous wear with no lifting or issues. Try it and let me know!
4. Take care. Moisture is one of your nails' biggest enemies. Try to avoid water and washing after applying your nails for at least a few hours if possible. Many nail lovers choose to apply their press ons at bedtime for this reason... while you dream, the glue gets to cure undisturbed before having to face the rigors of daily life. After that, avoid tasks that involve soaking, and always be sure to dry your hands thoroughly after washing to keep moisture from finding a way in.
5. Uh-oh! You hit your hand on something? A corner is lifting? To avoid the possibility of injury, don't let issues like this go unaddressed. A timely dab of glue or proactive removal can help avoid tears and band-aids later.
